How to setup ERPNext in Ubuntu via VM
6/2/2025
📅 June 2, 2025ERPNext is a powerful open-source ERP platform, but installing it directly on your main computer can sometimes feel daunting or risky. Especially if one is not familiar with Linux distro (Ubuntu, here), and unfortunately, ERPNext only works on Ubuntu. Using a virtual machine lets you keep your host system clean while giving ERPNext its own dedicated environment to run and grow.
In this guide, we will walk through the step-by-step process of creating an Ubuntu VM, installing all the prerequisites, and setting up ERPNext so you can start managing your business operations.
Note: Bugs or issues you might encounter during the process are listed at the end of this guide. I do this to prevent disrupting the flow of the guide if I keep randomly mentioning them in between, and so this guide will assume that (ideally) you have a smooth installation process.
First, we need a virtual machine, and we'll be using Oracle VirtualBox.
Download it here: https://www.virtualbox.org/wiki/Downloads
Pick the installer for Windows (assuming most readers here are Windows users). The installation process is straightforward and follows the usual steps.
Next, we select a Linux distribution -- Ubuntu. Other distros, and Ubuntu flavors might work, but ERPNext is best suited with Ubuntu. Here, I recommend Ubuntu 22 LTS because it is proven to be the most stable with ERPNext.
Download Ubuntu 22 LTS here: https://releases.ubuntu.com/jammy/
Creating Your Ubuntu Virtual Machine
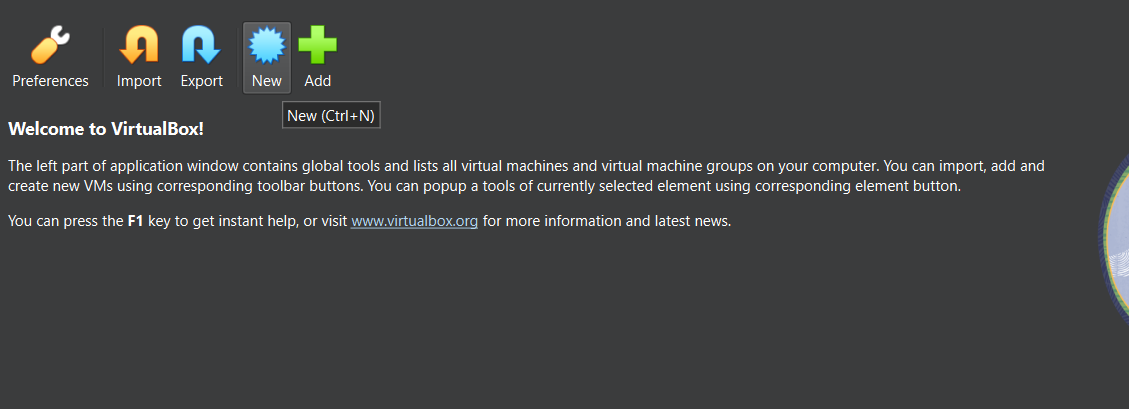
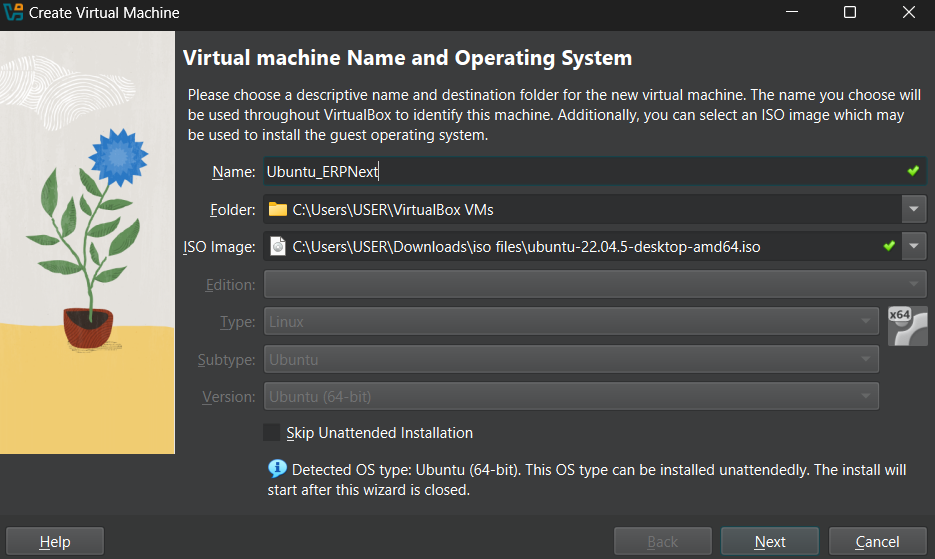
Now that VirtualBox is installed and ready, let's create your Ubuntu virtual machine. Open VirtualBox and click New to start building your digital sandbox. Give your VM a name, like Ubuntu_ERPNext, set the type to Linux, and pick Ubuntu 64-bit as the version (the VM will do this automatically for you).
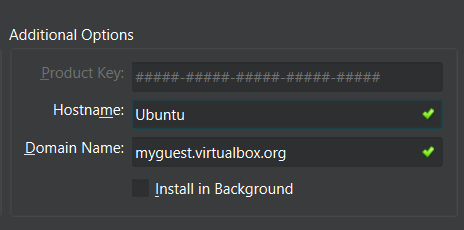
If your hostname is something like Ubuntu_ERPNext, change it simply to Ubuntu like here.
Allocate at least 4 GB of RAM (4096 MB), assign 2 CPU cores, and for the virtual hard disk, I’ll go with the default 25 GB. Ubuntu isn’t as large as Windows, so you don’t need to worry about space here.

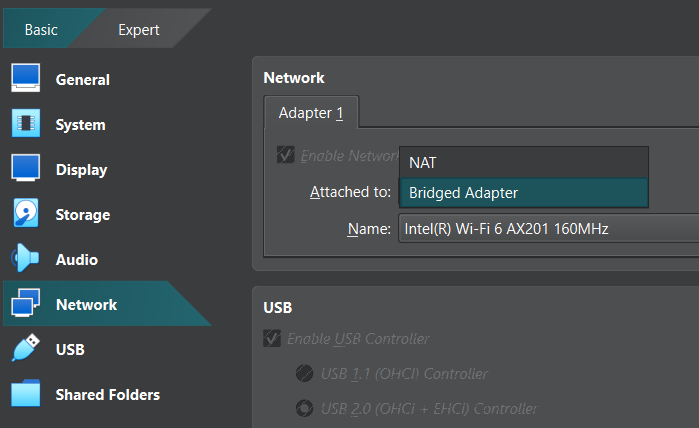
For the network adapter, choose Bridged Adapter. This allows your VM to connect through your host machine’s network, which will be necessary when fetching resources and dependencies for ERPNext.
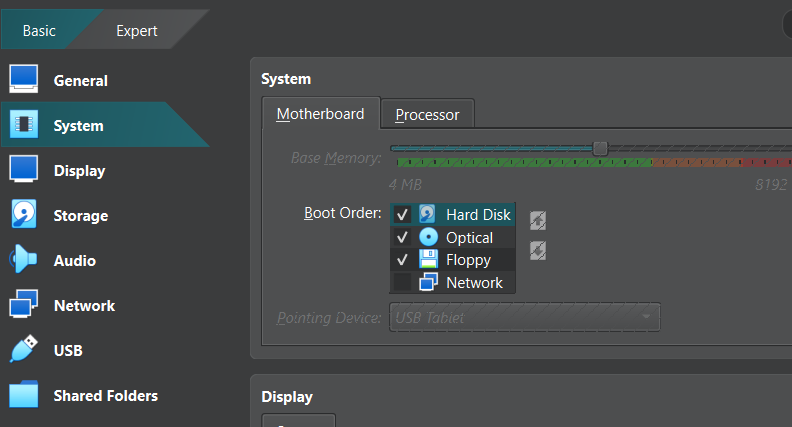
Don’t forget to prioritize the hard drive in the boot order settings.
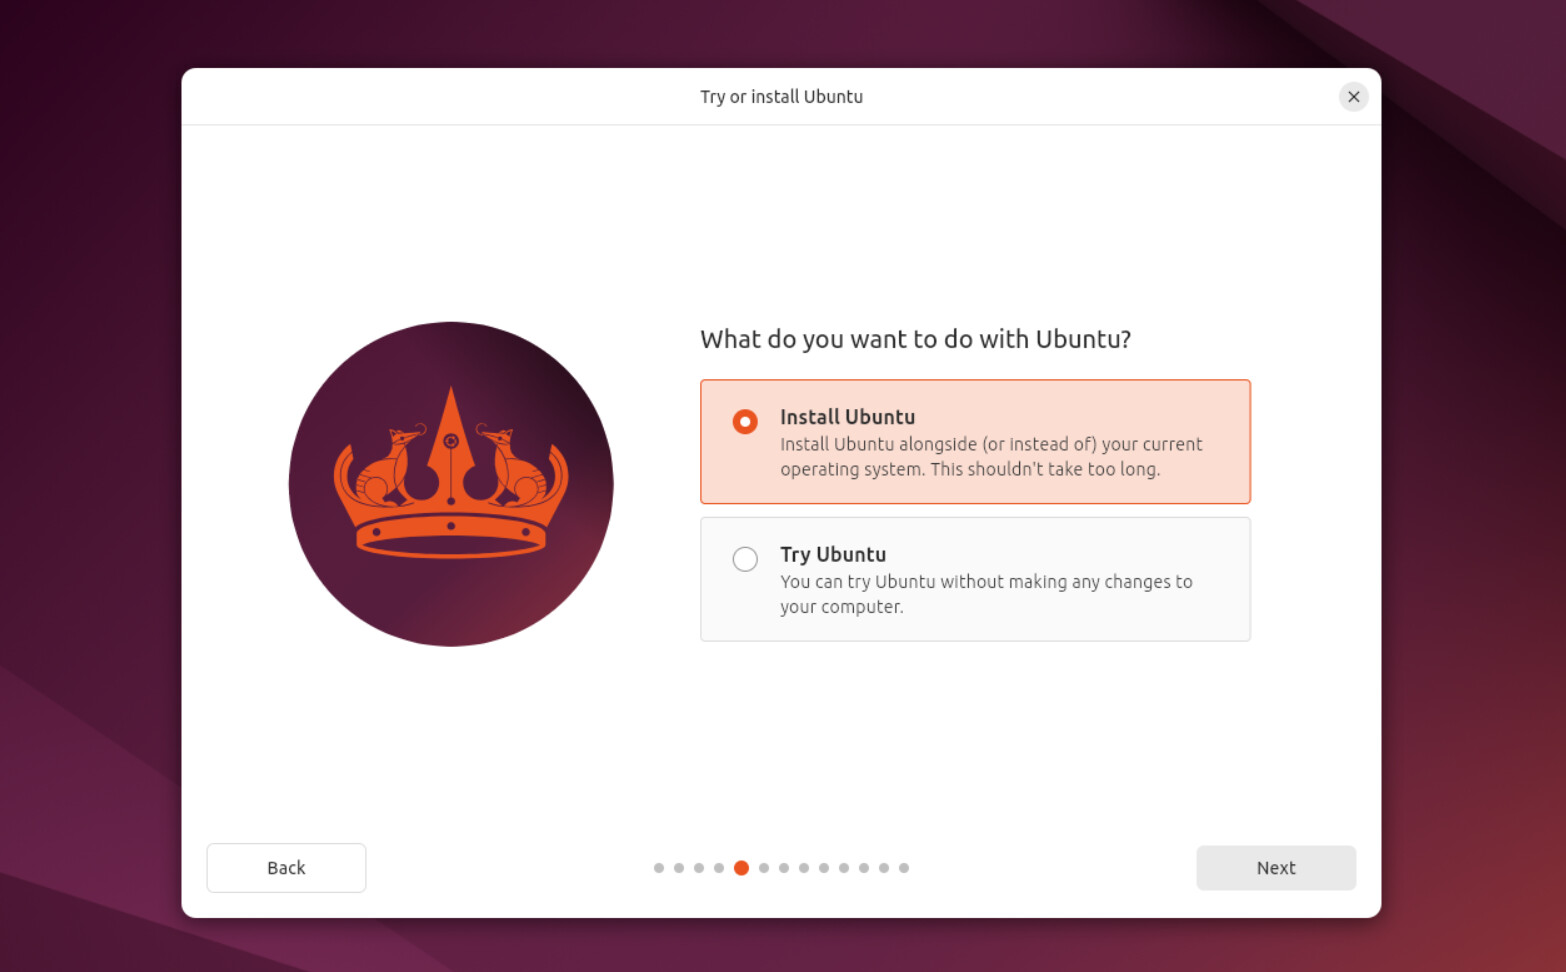
After creating the VM, click Start to boot it up. The VM should load the Ubuntu installer from the ISO you attached. If you see the GRUB menu, choose Install Ubuntu and proceed. If the VM boots directly into the Live Environment (a fully functional trial version running from the virtual USB), simply double-click the Install Ubuntu icon on the desktop to start the installation.
Follow the installer prompts to set your language, keyboard, timezone, and create your user account. When asked about installation type, select Erase disk and install Ubuntu — this affects only the VM’s virtual disk, so your main computer is safe.
Once you start the installation, it will take about 10 minutes to complete. After it finishes, restart the VM and log into your fresh Ubuntu system.
Update Ubuntu and Install Prerequisites
Now that you have Ubuntu installed and running inside your VM, it’s important to make sure your system is up-to-date and ready for ERPNext.
Open the Terminal by pressing Ctrl + Alt + T, then run these commands to update your package lists and upgrade installed software:
sudo apt update && sudo apt upgrade -y
This command refreshes the package information and installs any available updates to keep your system secure and stable.
Once your system is updated, install each required package one by one:
sudo apt install -y curl
sudo apt install -y git
sudo apt install -y python3-dev
sudo apt install -y python3-pip
sudo apt install -y software-properties-common
sudo apt install -y xvfb libfontconfig wkhtmltopdf
Each of these tools plays a role in preparing your system:
- curl: Downloads files and interacts with APIs
- git: Version control system to clone ERPNext source code
- python3-dev: Python headers needed for compiling dependencies
- python3-pip: Python package manager
- software-properties-common: Adds useful utilities like
add-apt-repository - xvfb & libfontconfig: Virtual framebuffer and font configuration for rendering PDFs
- wkhtmltopdf: Converts HTML to PDF for report generation in ERPNext
Next, ERPNext requires a database to function, so we’ll install the MariaDB server along with its client tools and development libraries:
sudo apt install -y mariadb-server
sudo apt install -y mariadb-client
sudo apt install -y libmysqlclient-dev
Here’s what each of these packages does:
- mariadb-server: The actual MariaDB database server used to store ERPNext data
- mariadb-client: Command-line tools to interact with the MariaDB server
- libmysqlclient-dev: Development libraries for MySQL-compatible clients, needed for building database integrations
For caching, queuing, and in-memory data storage, ERPNext also requires the Redis server:
sudo apt install -y redis-server
First, download and run the setup script from NodeSource to add the Node.js 22 repository to your system’s apt sources. This prepares your system for installing Node.js and the npm package manager:
curl -fsSL https://deb.nodesource.com/setup-22.x | sudo -E bash -
Then, install Node.js and Yarn:
sudo apt install -y nodejs
sudo npm install -g yarn
Here's what each command does:
- setup-22.x script: Adds the Node.js 22 repository to
apt - nodejs: Installs Node.js runtime and
npmpackage manager - yarn: Installs Yarn globally, a faster alternative to
npmfor managing JavaScript dependencies
That's it for all the required dependencies.
Setting up Frappe and ERPNext
To install frappe-bench, it's important to first set up a Python virtual environment. On Debian/Ubuntu systems, Python enforces PEP 668 protections, which may prevent package installations outside a virtual environment.
We'll start by creating a development directory and setting up the virtual environment inside it:
# Create a directory named frappe-dev
mkdir frappe-dev

# Navigate into the directory
cd frappe-dev

# Create a virtual environment named 'venv'
python3 -m venv venv

# Activate the virtual environment
source venv/bin/activate
Once activated, you’ll see (venv) appear in your terminal prompt — indicating that the virtual environment is now active.
You can deactivate the environment anytime by running deactivate.
With this in place, you’re now ready to install frappe-bench and continue the setup.
pip install frappe-bench
Now, initialize the Frappe bench by running the following command:
bench init frappe-bench
This will create a new folder named frappe-bench with all the necessary files and configuration for your Frappe development environment.
If you run into errors during initialization, it's likely that your system is missing some required build tools. Install them with:
sudo apt install -y pkg-config build-essential
These packages provide essential system utilities and compilers needed to build Python and Node.js dependencies during the bench setup process.
Most importantly, you need to download the ERPNext application into your bench environment. Run the following command inside your frappe-bench directory:
bench get-app erpnext https://github.com/frappe/erpnext
This command clones the ERPNext repository and makes it available for installation on your bench.
After downloading the ERPNext app, you are ready to create your ERPNext site:
bench new-site erp.local
You can name the site whatever you prefer; here, erp.local is just an example.
When creating a new site, you will be prompted to set the MariaDB root password and the site’s Administrator password. However, at this point, these passwords may not yet be configured.
By default, MySQL on Ubuntu uses the auth_socket plugin for the root user. This means instead of authenticating with a password, MySQL verifies that the user running the command matches the MySQL root user via the Unix socket. For example, if you are logged in as vboxuser, you are not MySQL's root user and cannot log in as root using a password, because MySQL expects socket-based authentication instead.
Since MySQL on Ubuntu uses the auth_socket plugin by default, password-based login as root will fail—even if you're the admin.
The recommended approach is to create a new MariaDB user with a password or change the root user to use password authentication.
If not prompted automatically, you can manually set or change the password inside the MariaDB shell (sudo mysql) using:
ALTER USER 'root'@'localhost' IDENTIFIED WITH mysql_native_password BY 'your_secure_password';
FLUSH PRIVILEGES;
This changes the root user to use password authentication instead of auth_socket. After this, you can log in with the root password you just set.
Earlier, we installed redis-server, but we haven’t enabled or started it yet. Let’s do that now:
sudo systemctl start redis-server
sudo systemctl enable redis-server
Next, configure Redis for bench by running:
bench setup redis
Finally, you can create your ERPNext site:
bench new-site erp.local
After the site is created, Frappe will automatically set it up. Once done, you can access the site by visiting:
http://127.0.0.1:8000— if you're accessing it from the same machinehttp://192.168.100.73:8000— — note that the last part of the IP, or host IP (e.g.,.73) may vary depending on your device.
On the login screen, use the default username Administrator and the Administrator password you set during bench new-site setup.
And with that, your ERPNext system is up and running! You can now explore features like the Point of Sale (POS) system and begin configuring your workspace to suit your business needs.
Common Installation Issues
1) “User is not in the sudoers file” error
If your username (e.g., vboxuser) isn't in the sudo group, you won't be able to run commands with sudo. To fix this, follow these steps to add yourself to the sudo group from a root shell:
- Reboot your system and enter the GRUB menu by pressing Esc or Shift during boot.
- Select your Ubuntu entry and press e to edit it.
- Find the line that starts with
linux /boot/vmlinuzand addinit=/bin/bashto the end of that line. - Press Ctrl + X or F10 to boot into a root shell.
- Remount the filesystem as writable:
mount -o remount,rw / - Add your user to the
sudogroup:usermod -aG sudo vboxuser - (Optional but recommended) Set a root password:
passwd - Finally, reboot the system normally:
exec /sbin/init
After this, you should be able to use sudo normally with your user account.
2) CSS Files Not Loading (404 Errors)
If your ERPNext login page or site loads without any styling — just plain HTML — and your browser console or terminal shows errors like:
/assets/frappe/dist/css/login.bundle.620LYWTE.css - 404
/assets/frappe/dist/css/website.bundle.TTBWK5JW.css - 404
This happens because your site isn't running in production mode and the necessary CSS bundles haven’t been built yet.
To fix it:
- Run the following to build the required production files:
bench build --production - Then restart the bench:
bench start
If you still face issues, make sure your file permissions are not blocking access. Run:
sudo chmod 755 /home/vboxuser   # Replace with your actual username
sudo chmod -R o+rx /home/frappe-dev
This ensures that the ERPNext server has permission to access your assets directory.